Shopping Cart (0)
Your cart is empty.


Start stop or restart your server
Still need help?
Chat with us live or open a support ticket and we’ll get back to you as soon as possible.
Contact usHow to Manage Your Server: Start, Stop, and Restart
Keeping your Minecraft server online and running has never been easier. With PineRiver’s user-friendly game panel, you can easily start, stop, and restart your server with just a few clicks. Follow this guide to learn how to manage your server and keep it optimized for your gaming community.
Step 1: Log In to the Game Panel
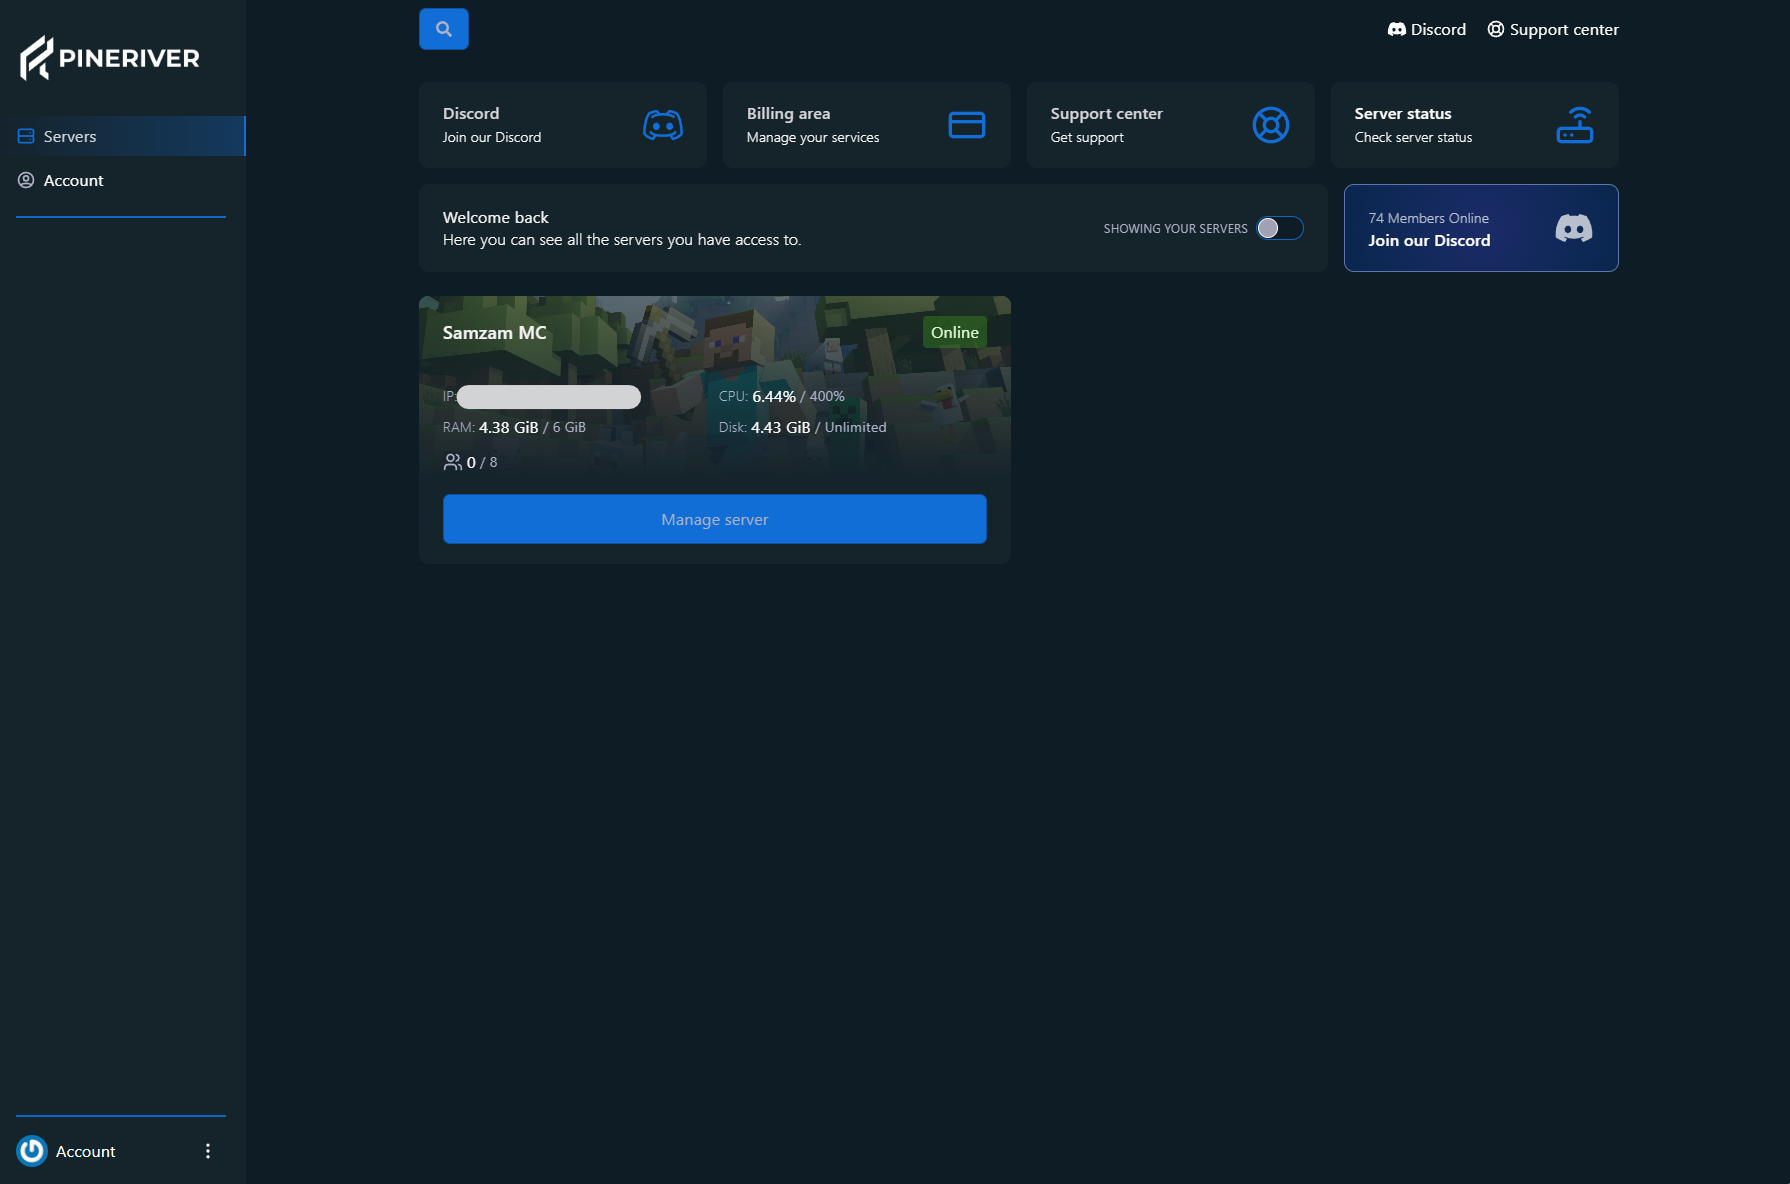
The game panel is your central platform for managing your server. Once your server is activated, you will receive an email with the subject "Server Installed". If you can’t find the email, be sure to check your spam folder. The email contains a link to the game panel, where you’ll find an overview of your servers. The overview looks like this:
Step 2: Select Your Server
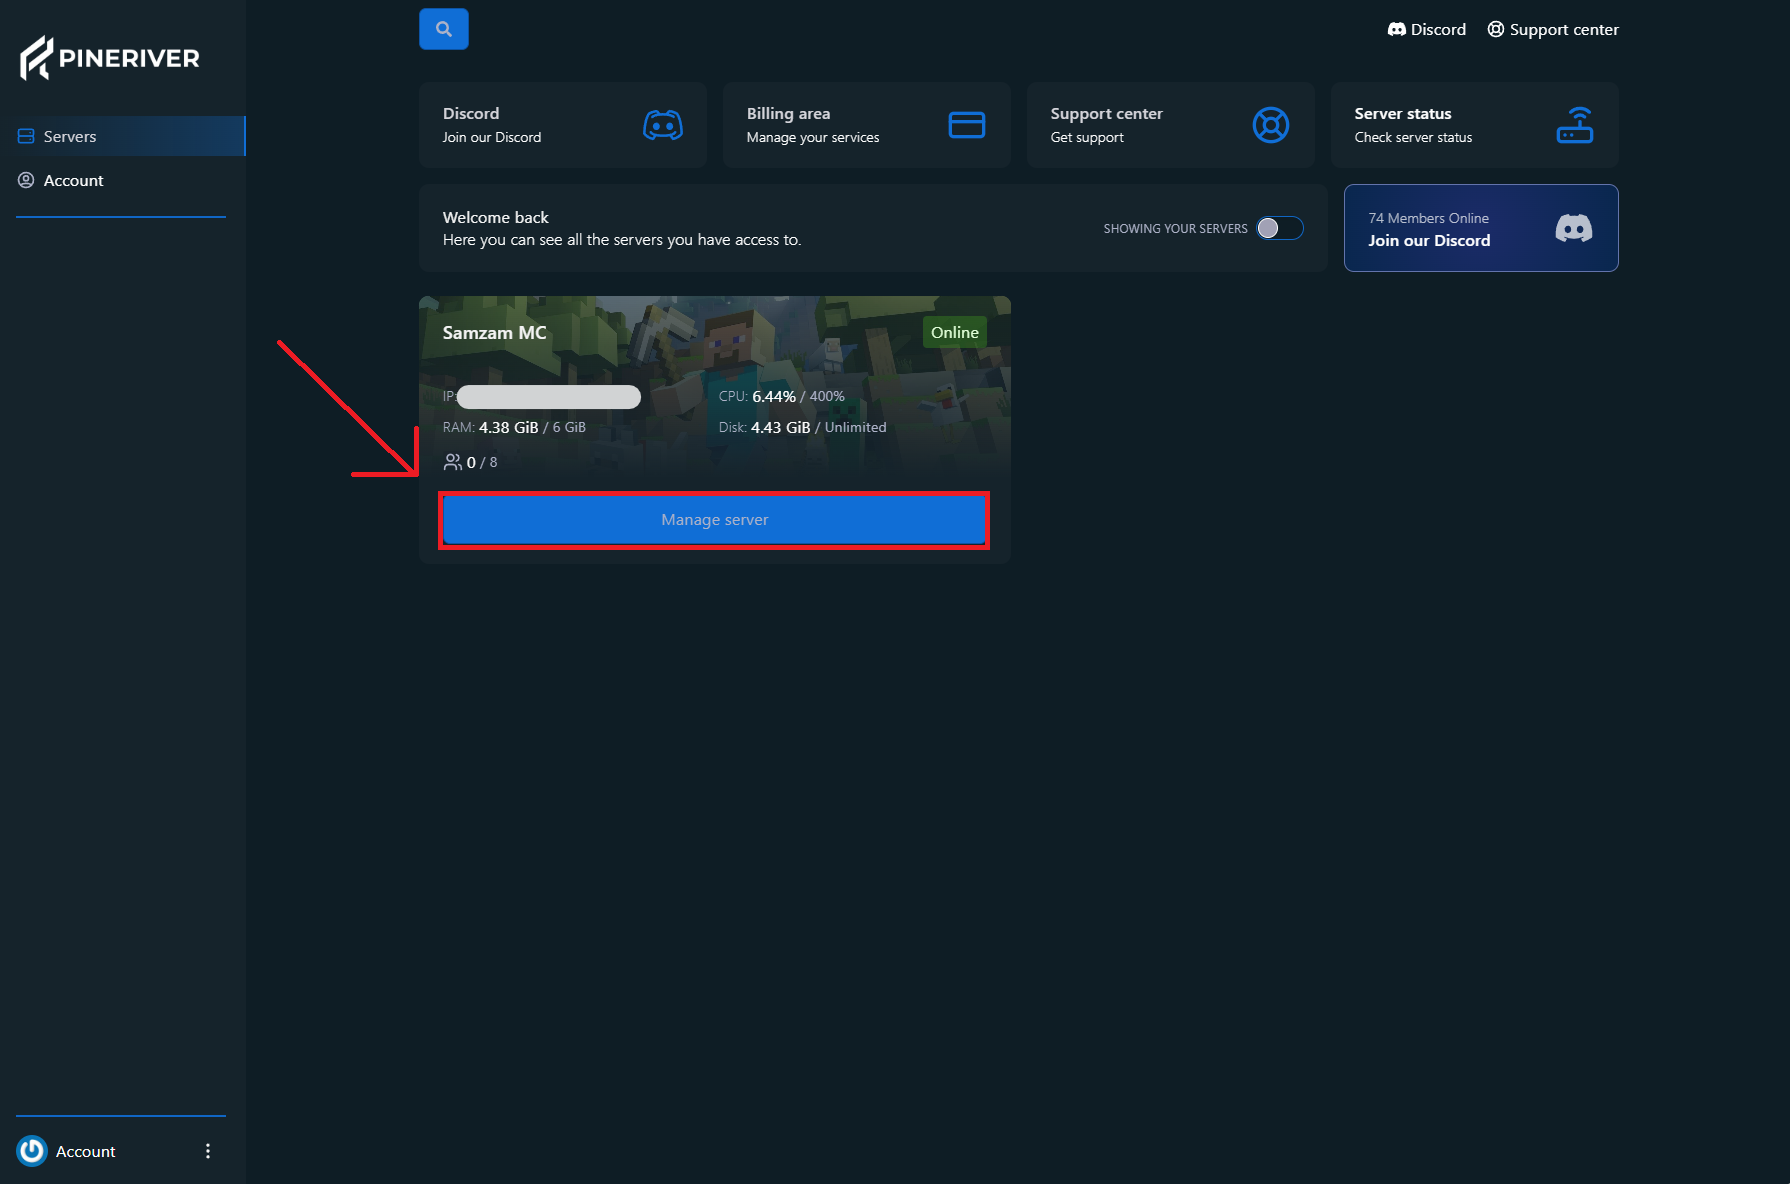
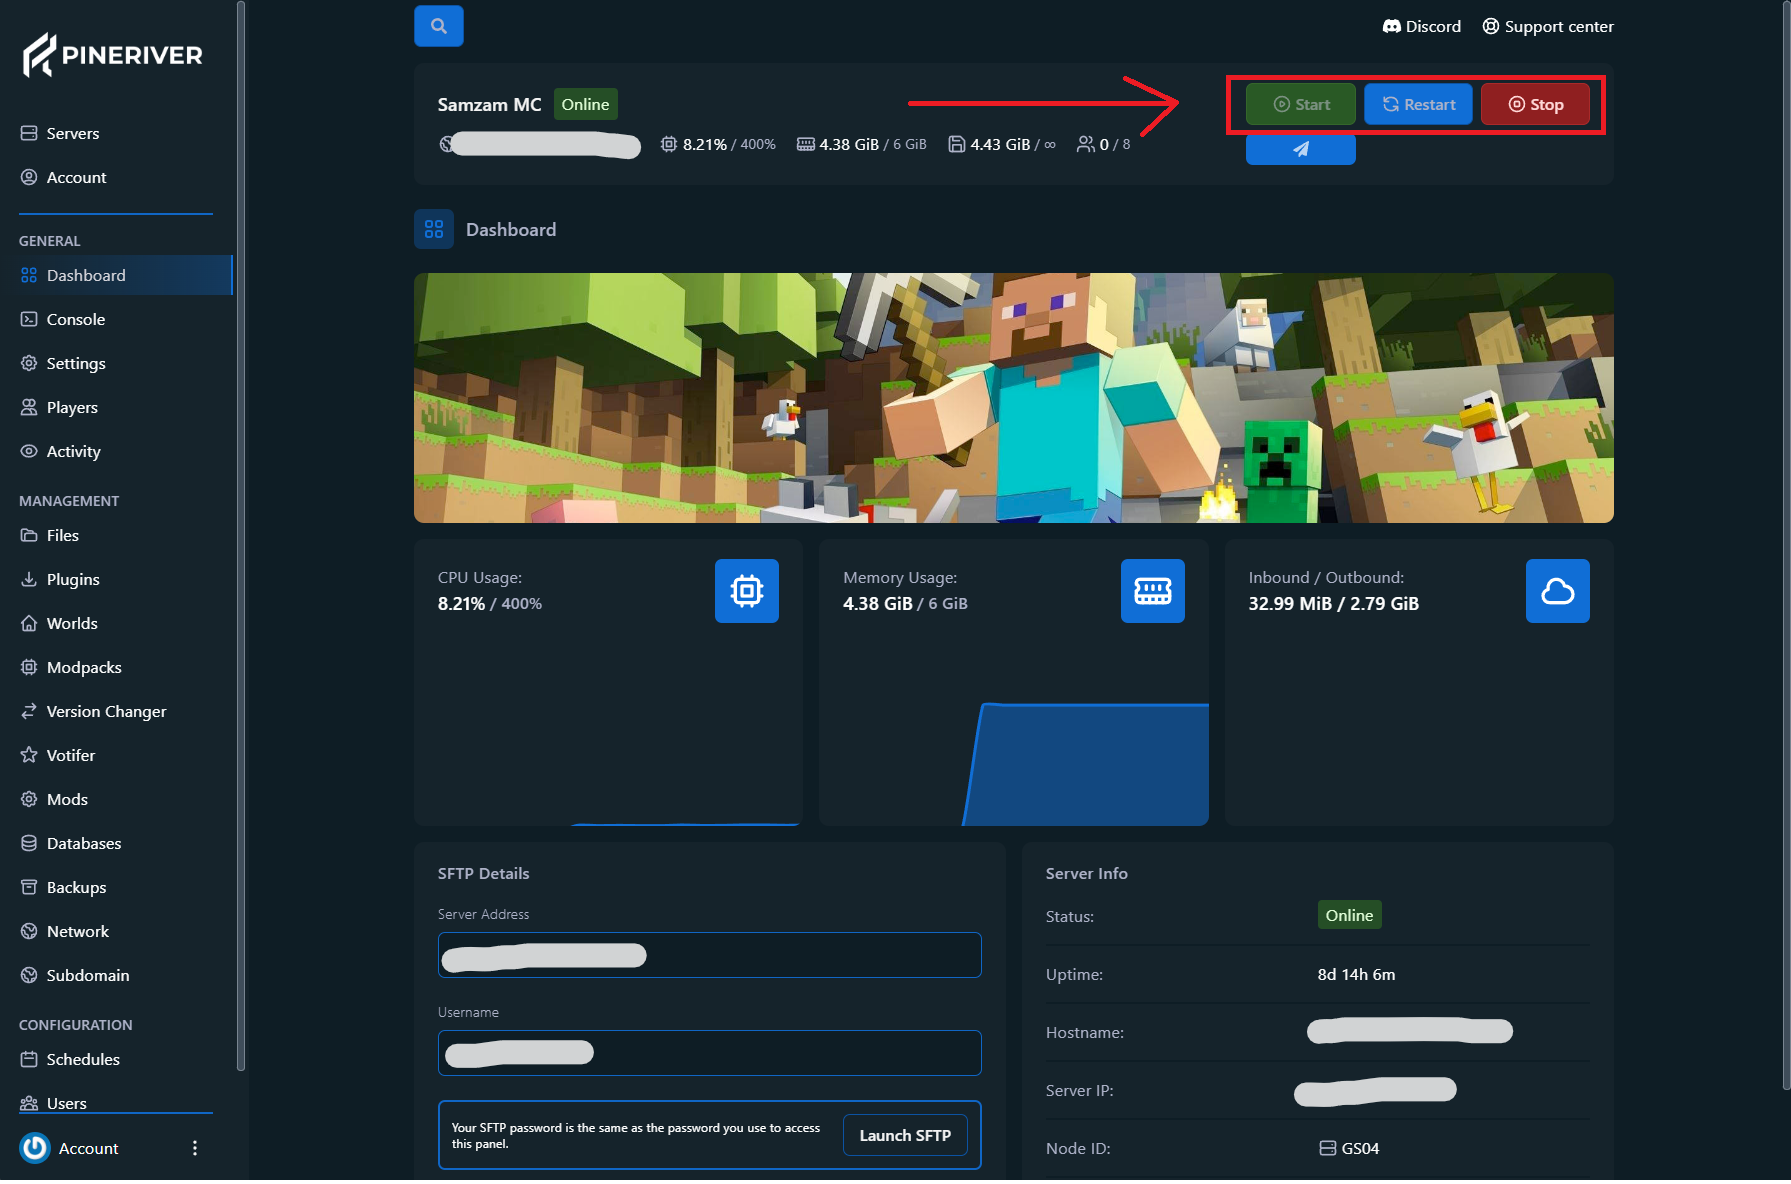
Click on the name of the server you want to manage to open its dashboard. Here you’ll get an overview of the server’s status, the number of active players, and resource usage. The dashboard looks like this:
Step 3: Start Your Server
To start your server, simply click "Start". On first launch, you will be asked to accept Mojang’s EULA (End User License Agreement). Once you’ve accepted the EULA, the server will automatically start using the latest version of Minecraft and go online.
Step 4: Stop or Restart Your Server
Need to perform updates or fix issues? Use the "Stop" and "Restart" buttons directly from the dashboard. The stop function safely shuts down the server, while restart quickly reloads it.
Tip: Thinking about starting a new server? View our hosting plans here and get access to high-performance, reliable game servers!

Create Your Own ServerAre you ready to begin?
Start your server today and we'll give you a 25% discount on your first server. Use code NEW25 at checkout.

PineRiver is a modern hosting company delivering game servers, dedicated servers, web hosting and VPS with a focus on quality, stability and ease of use.
We are reviewed
awesome
PineRiver
73 onlineCopyright © 2026 PineRiver [DK41080841] | All rights reserved.


