How to Install Plugins on Your Rust Server
Installing plugins allows you to customize and enhance your Rust server to create a unique gaming experience. Follow this guide to install and manage plugins using our game panel.
Step-by-Step Guide
Step 1: Log in to the Game Panel
- Open your web browser and navigate to the game panel's URL.
- Log in with your credentials to access your server.
Step 2: Navigate to the "Startup" Section
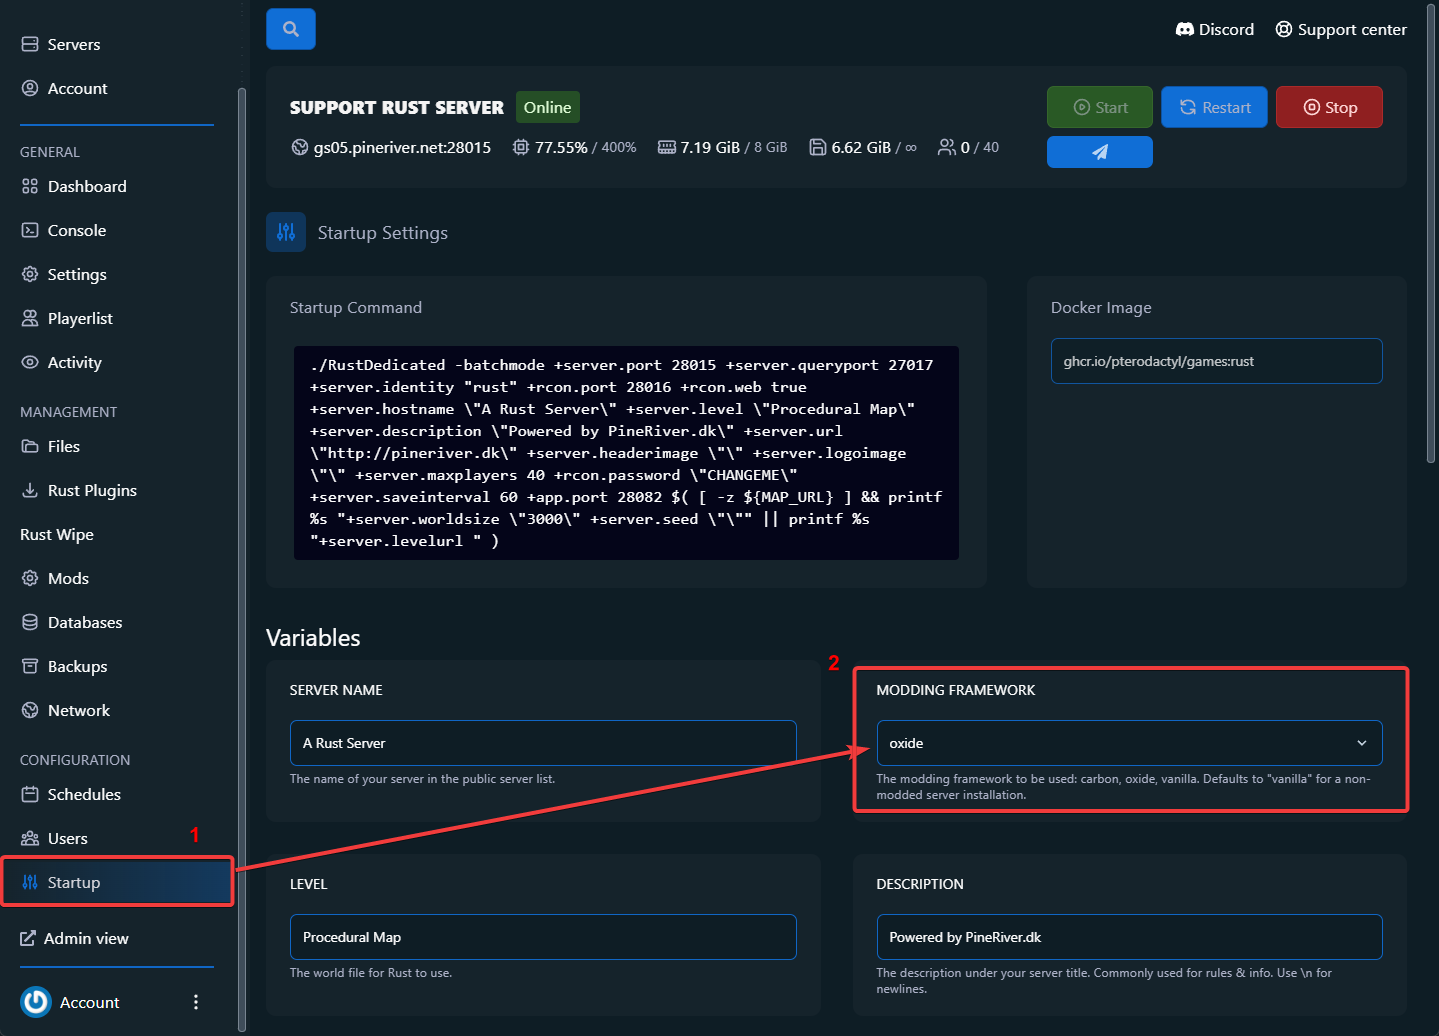
- After logging in, click on "Startup" in the left sidebar. (Marked as point 1 in the image below).
Step 3: Select "Modding Framework"
- Within the "Startup" section, locate the variable "Modding Framework".
- Click on the dropdown menu and select "oxide" (Marked as point 2 in the image).
- Save changes if required.
Step 4: Navigate to the "Rust Plugins" Section
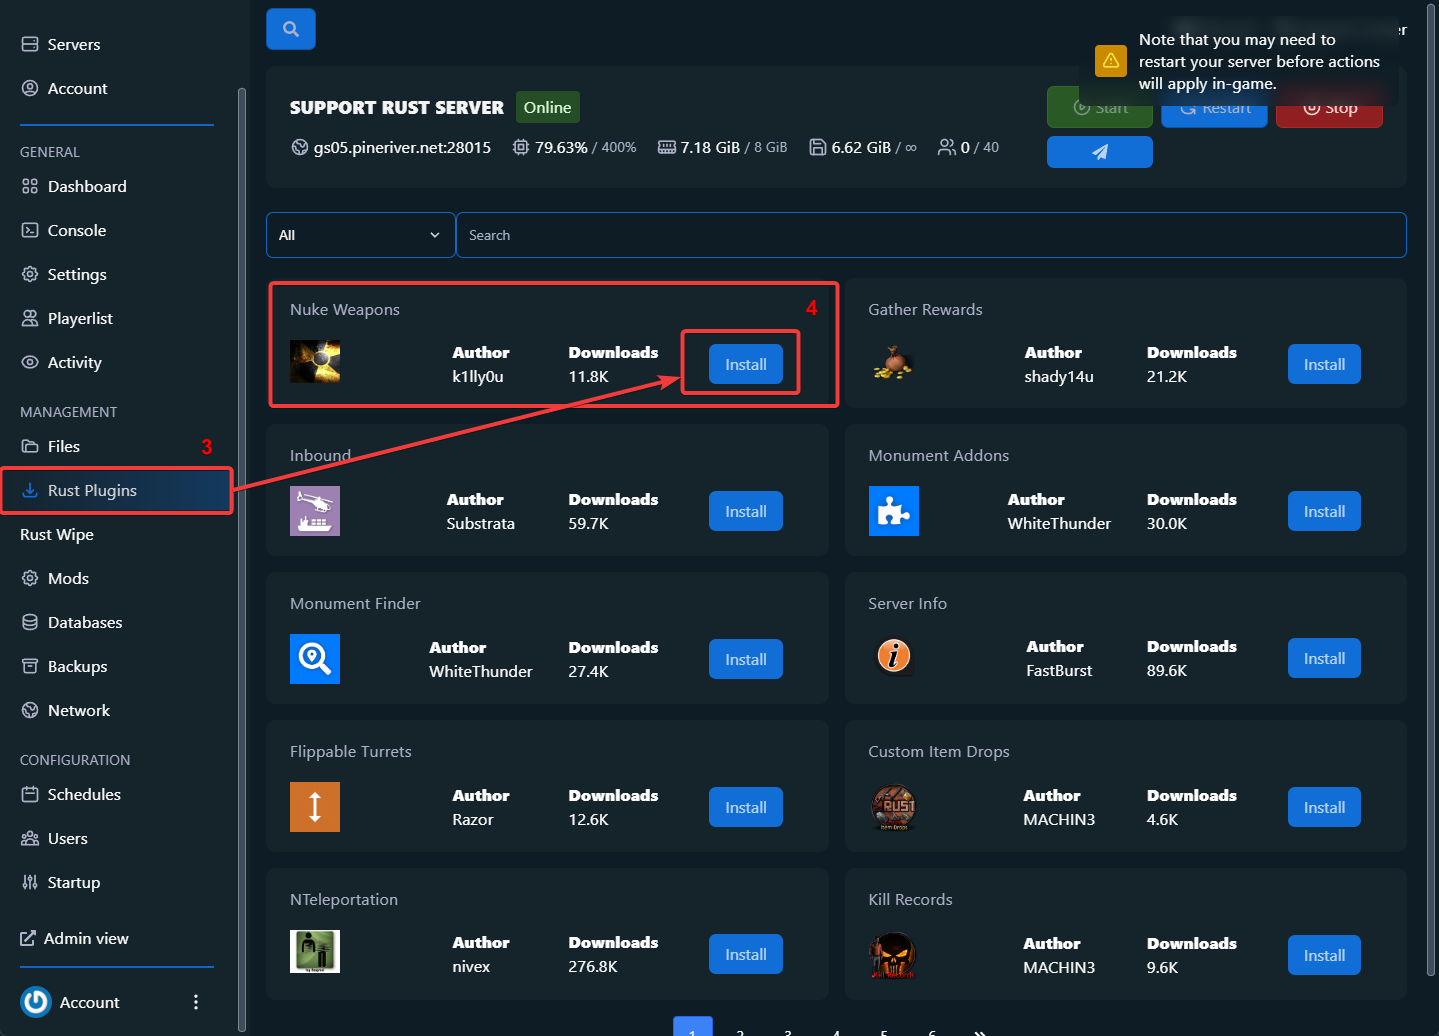
- Click on "Rust Plugins" in the left sidebar. (Marked as point 3 in the image below).
Step 5: Install a Plugin
- In the "Rust Plugins" section, you will see a list of available plugins.
- Find the plugin you want to install. In this example, "Nuke Weapons" is selected (Marked as point 4 in the image).
- Click the "Install" button next to your chosen plugin.
Step 6: Restart the Server
- After installing a plugin, you may need to restart your server to activate the changes.
- Click the "Restart" button at the top of the page to restart your server.
Step 7: Confirm Installation
- Log in to your Rust server after the restart to confirm that the plugin is correctly installed and functioning as expected.
Additional Support
If you encounter issues during the installation or use of plugins, you can contact our support team via the game panel's support center.
CTA: Looking for a reliable Rust server? Explore our hosting plans and take full control of your gaming experience with easy plugin management!


